Lab02: Deploying DialoGPT-Medium with FastAPI & Docker
Introduction
In Lab02, We are going to look at how Jupyter/Colab Notebook models, codes are actually deployed as a service.
This is a simple chatbot called simple chat which is containerized in Docker and run on FastAPI.
We will build and deploy this chatbot using DialoGPT as the model, use FastAPI to create API endpoints, and deploy it with Docker.
The goal of this lab is to experience the end-to-end of deploying and serving a LLM model from scratch, with minimal configuration.
About the model
DialoGPT is a large-scale neural conversational response generation model developed by Microsoft, designed specifically for building open-domain chatbots that can generate human-like responses in dialogue settings.
I chose DialoGPT just for the sake of its simplicity so that I can focus more on the deployment part.
Check here for more information about DialoGPT if you are interested.
Steps
0. Setting Environment
Since every configuration is in lab_02/pyproject.toml, at lab_02/, type these commands on CLI:
 uv sync
 source .venv/bin/activate
1. Importing a Model
First, we import the LLM we are going to use.
Most of the popular open weight models can be found in Hugging Face.
If we install huggingface-hub, we can easily import the model (since huggingface-hub is included in the environment, you don’t need to install it manually):
model_name = "microsoft/DialoGPT-medium"
There are some NLP-specific concepts and processes in model.py but since this isn’t related to our goal, we will skip this part for now.
We can test if the model imported works well by typing
python -m model
It should show up like this:
❯ python -m model
Using device: cuda
DialoGPT Chat Bot - Type 'quit' to exit
You:
Try typing some words or a sentence to check if the model actually works.
❯ python -m model
Using device: cuda
DialoGPT Chat Bot - Type 'quit' to exit
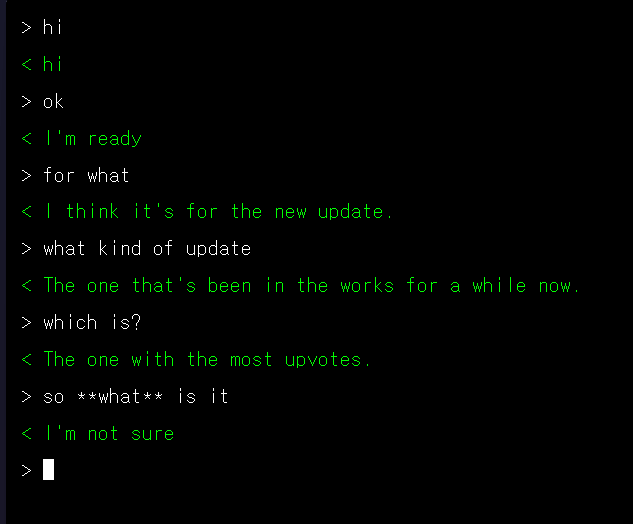
You: hi
Bot: hi
You: how are you?
Bot: I'm good, how are you?
2. FastAPI Integration
Now we will use FastAPI to serve the model through API endpoint. This makes the model run on server (just like we use ChatGPT models via API keys)
from fastapi import FastAPI

app = FastAPI(title="Lab02: simple chat")
This creates a FastAPI app.
We will first make Pydantic classes which defines the types of parameters for inputs and outputs of the API routes.
Since we are making a very simple chat application, we are only going to use two classes, ChatRequest and ChatResponse.
from fastapi import FastAPI
from pydantic import BaseModel

app = FastAPI(title="Lab02: simple chat")

class ChatRequest(BaseModel):
    message: str
    max_length: int = 100

class ChatResponse(BaseModel):
    response: str
The data models we define for our API requests and responses inherit from Pydantic’s BaseModel class.
ChatRequest has message and max_length of message. message here means the user’s message. The reason we have max_length parameter is because DialoGPT-medium is not good at processing long text, but for short conversation, so we set it to 100.
ChatResponse has response, which of course, is the response from the chatbot.
Now we can add routers that detects requests(GET, POST, PUT, DELETE) to the routers.
@app.get("/")
async def root():
    return {"message": "simple chat is running."}

@app.get("/health")
async def health_check():
    return {"status": "healthy"}
"/" and "/health" are the most basic routers used."/" is used when there are no routers and just the port number given (e.g. localhost:8000/), so it is usually used as default state.
"/health" is used for health check; if the service is running and healthy. If it is running, {"status": "healthy"} will likely show up.
Now we need to add the model we imported in step 1.
from fastapi import FastAPI
from model import generate_response
from pydantic import BaseModel

# ...

@app.post("/chat", response_model=ChatResponse)
async def chat(request: ChatRequest):
    try:
        model_response = generate_response(request.message, request.max_length)
        return ChatResponse(response=model_response)
    except Exception as e:
        return ChatResponse(response=f"Error: {str(e)}")
response_model parameter in @app restricts the Schema of the response format.
The code above just simply takes request and use generate_response from model.py and output the response in ChatResponse format.
We can test if FastAPI works well using uvicorn:
import uvicorn
from fastapi import FastAPI
from model import generate_response
from pydantic import BaseModel

app = FastAPI(title="simple chat")

class ChatRequest(BaseModel):
    message: str
    max_length: int = 100


class ChatResponse(BaseModel):
    response: str


@app.get("/")
async def root():
    return {"message": "simple chat is running."}


@app.post("/chat", response_model=ChatResponse)
async def chat(request: ChatRequest):
    try:
        model_response = generate_response(request.message, request.max_length)
        return ChatResponse(response=model_response)
    except Exception as e:
        return ChatResponse(response=f"Error: {str(e)}")


@app.get("/health")
async def health_check():
    return {"status": "healthy"}


if __name__ == "__main__":
    uvicorn.run(app, host="0.0.0.0", port=8000)
if we run python main.py, it will deploy the FastAPI in port defined(8000) in this case.
After running python main.py, go into localhost:8000/ and check if you see {"message": "simple chat is running."} on the screen.
Since "/chat" is a POST method, we need to use curl or service like PostMan in order to check if it works correctly.
3. Frontend
Now we need to make a frontend that presents the chat interface with the user and the chat bot.
<!DOCTYPE html>
<html>
<head>
    <meta charset="UTF-8">
    <meta name="viewport" content="width=device-width, initial-scale=1.0">
    <title>chat</title>
    <style>
        ...
    </style>
</head>
<body>
    <div id="terminal">
        <div class="msg">
            <span class="current-line">> <span id="current-input"></span><span class="cursor">█</span></span>
        </div>
    </div>

    <script>
        let currentInput = '';

        function add(text, user = false) {
            /**
             * Adds a message to the terminal display.
             * Removes the current input line, appends the message, and creates a new input line.
             *
             * @param {string} text - The message to display.
             * @param {boolean} [user=false] - If true, styles the message as a user message; otherwise, as a bot message.
             */

            const terminal = document.getElementById('terminal');
            const div = document.createElement('div');
            div.className = `msg ${user ? 'user' : 'bot'}`;
            div.textContent = text;

            // remove the current input line and append message
            const currentLine = terminal.querySelector('.current-line').parentElement;
            currentLine.remove();
            terminal.appendChild(div);

            const newLine = document.createElement('div');
            newLine.className = 'msg';
            newLine.innerHTML = '<span class="current-line">> <span id="current-input"> \
                                 </span><span class="cursor">█</span></span>';
            terminal.appendChild(newLine);

            terminal.scrollTop = terminal.scrollHeight;
        }

        function loading(show) {
            /**
             * Shows a loading UI if parameter show is true.
             *
             * @param {boolean} show - If true, shows a loading UI.
             */
            const terminal = document.getElementById('terminal');
            const el = document.getElementById('load');

            if (show) {
                const currentLine = terminal.querySelector('.current-line').parentElement;
                currentLine.remove();

                const div = document.createElement('div');
                div.id = 'load';
                div.className = 'loading';
                div.textContent = '...';
                terminal.appendChild(div);
                terminal.scrollTop = terminal.scrollHeight;
            } else if (el) {
                el.remove();

                const newLine = document.createElement('div');
                newLine.className = 'msg';
                newLine.innerHTML = '<span class="current-line">> <span id="current-input"> \
                                     </span><span class="cursor">█</span></span>';

                // create newLine again
                terminal.appendChild(newLine);
                terminal.scrollTop = terminal.scrollHeight;
            }
        }

        async function send() {
            /**
             * Sends the message input to the server
             */
            const msg = currentInput.trim();

            if (!msg) return;
            if (msg == "clear()" || msg == "clear") {
                // Clear all the content in terminal and start fresh
                const terminal = document.getElementById('terminal');
                terminal.innerHTML = `
                    <div class="msg">
                        <span class="current-line">> <span id="current-input"></span> \
                        <span class="cursor">█</span></span>
                    </div>
                `;
                currentInput = '';
                return;
            }

            add(msg, true);
            currentInput = '';
            document.getElementById('current-input').textContent = '';
            loading(true);

            try {
                const res = await fetch('/api/chat', {
                    method: 'POST',
                    headers: { 'Content-Type': 'application/json' },
                    body: JSON.stringify({ message: msg, max_length: 100 })
                });
                const data = await res.json();
                loading(false);
                add(res.ok ? data.response : 'error');
            } catch {
                loading(false);
                add('failed');
            }
        }

        document.addEventListener('keydown', function(e) {
            if (e.key === 'Enter') {
                e.preventDefault();
                send();
            } else if (e.key === 'Backspace') {
                e.preventDefault();
                currentInput = currentInput.slice(0, -1);
                document.getElementById('current-input').textContent = currentInput;
            } else if (e.key.length === 1) {
                e.preventDefault();
                currentInput += e.key;
                document.getElementById('current-input').textContent = currentInput;
            }
        });

        document.addEventListener('click', function() {
            document.body.focus();
        });
        document.body.focus();
    </script>
</body>
</html>
This is a simple static HTML file that has terminal-like design.
try {
		const res = await fetch('/api/chat', {
			method: 'POST',
			headers: { 'Content-Type': 'application/json' },
			body: JSON.stringify({ message: msg, max_length: 100 })
		});
		const data = await res.json();
		loading(false);
		add(res.ok ? data.response : 'error');
	} catch {
		loading(false);
		add('failed');
	}
Via the send function, it will POST the message through /api/chat. This is a relative route, which means it sends based on the current domain/port the frontend file is deployed ({current_domain}/{current_port}/api/chat).
A common and effective pattern for connecting a static frontend to a backend API is to use a reverse proxy server.
When you serve static files and run a backend API from the same origin, you often encounter issues like Cross-Origin Resource Sharing (CORS) errors, because both use different domain/port when deployed.
A proxy server, like Nginx which we will use in this lab, helps solve this by acting as an intermediary. It can handle requests for static files directly and forward API requests to the appropriate backend server. While CORS is the major reason why we use Proxy servers, using proxy server also gives advantage in performance, efficiency, and security.
To use Nginx, we simply add a file nginx.conf and configure the Nginx setting.
server {
    listen 80;
    server_name localhost;

    # static file setting
    root /usr/share/nginx/html;
    index index.html;

    location / {
        try_files $uri $uri/ /index.html;
    }

    # API Proxy
    location /api/ {
        proxy_pass http://backend:8000/;
    }

    # health check
    location /health {
        proxy_pass http://backend:8000/health;
    }
}
Forget about the extra performance/reliability configurations. We will only check the critical parts.
listenandserver_namelets the nginx proxy server to take responsibility on{server_name}:{listen}(eg.localhost:80in this case).indexis a special key that serve as the default pagetry_files ... /index.htmlensures that no matter what valid client-side route a user tries to access directly or refresh on, Nginx will always serve the mainindex.html, allowing client-side router to handle the rest.location /api/means if the request starts with/api/(like/api/chat), Nginx will use thelocation /api/block.- If the location starts with
/api, it will proxy pass tobackend:8000. This is available because of docker-compose which I will explain later.
- If the location starts with
- If the request is exactly
/health(notice it doesn’t have a slash(/) after ‘health’), Nginx will use thelocation /healthblock. - If neither of those matches, then Nginx falls back to the most general
location /block./acts as a catch-all for anything that hasn’t been specifically handled by anotherlocationblock.
4. Dockerfile and docker-compose
Now we finally deploy backend and frontend, using Dockerfile and docker-compose.
Since this is a monorepo that contains both frontend and backend, we will write two Dockerfiles(Dockerfile.frontend, Dockerfile.backend) and connect them with docker-compose.
# base: nginx
# alpine is Alpine Linux, a lightweight Linux distribution
FROM nginx:alpine

# Copies local index.html file into the default directory
# Nginx serves static files from inside the container.
COPY index.html /usr/share/nginx/html/
# Copies custom Nginx configuration file into the container
COPY nginx.conf /etc/nginx/conf.d/default.conf
EXPOSE 80
Dockerfile.frontend uses a light version of Nginx called nginx:alpine as the base environment and uses index.html (frontend HTML file) and nginx.conf (our nginx configuration). We expose it in port 80. Note that the port 80 is NOT the external port number but the Docker’s internal port number.
FROM python:3.12-slim

WORKDIR /app

# Install uv
RUN pip install uv

# Copy only the dependency file first to leverage Docker cache
COPY pyproject.toml ./

# Install dependencies using uv
RUN uv sync --system

# Copy the rest of the application code
COPY . .

# EXPOSE port
EXPOSE 8000

# Execute server using the installed uvicorn
CMD ["uvicorn", "main:app", "--host", "0.0.0.0", "--port", "8000"]
Dockerfile.backend uses a slim version of Python 3.12, installs dependencies and expose port 8000. Finally it will run uvicorn to deploy the FastAPI app in main.py.
These Dockerfiles make sure the configuration and environments are all identical in any local environment.
We’ll also use docker-compose to manage our two Docker containers. docker-compose automatically creates a shared network for the services, enabling them to easily discover and communicate with one another by their service names.
services:
  backend:
    build:
      context: .
      dockerfile: Dockerfile.backend
    container_name: chat-backend
    ports:
      - "8000:8000"
    networks:
      - chat-network

  frontend:
    build:
      context: .
      dockerfile: Dockerfile.frontend
    container_name: chat-frontend
    ports:
      - "3000:80"
    depends_on:
      - backend
    networks:
      - chat-network

networks:
  chat-network:
    driver: bridge
When we use docker-compose in command line, it detects each container’s name as backend and frontend.
When we use docker in command line, it detects each container’s name as chat-backend and chat-frontend.
Both containers use the same network called chat-network, which enables containers to discover each other easily, enhance security, and avoids port conflicts.
For example, in nginx.conf, we used proxy_pass http://backend:8000/; instead of proxy_pass http://localhost:8000.
Now it’s very easy to deploy both services by simply typing
docker-compose up --build -d
--build: building the image before deploying the Docker containers-d: command runs on background
Check README.md for alternative scripts to run.